GUIDELINES FOR INTRODUCING A MATED OR VIRGIN QUEEN
The information provided below is meant to be used as a basic guide and covers some of the recognised methods of queen introduction. Although there are many different methods of introduction it must be remembered there is no fail-safe method to use. This guide should give you some useful hints and tips that you may find helpful when choosing an introduction method.
When a new queen bee is introduced to an existing colony or nucleus, there is always a remote chance the worker bees will not accept her and the result of this could be the death of your new queen. However, I have successfully used all of the methods laid out below.
What must I do before introduction?
You must firstly ensure the new or existing colony does not have a virgin queen or indeed a laying queen that has simply gone off lay in your colony. Conduct a careful inspection of the colony to ensure that no queens are present – the colony must be totally queen-less. You must also ensure you have removed all queen cells or queen cups. To achieve this, simply shake off all the bees from each of the frames and remove any cells or cups that are visible. Queen cells and cups can generally be found around the edges and bottoms of the frames. You must also ensure you do not have a laying worker in your colony. You can recognise this because a laying worker will lay the eggs half way down the cell wall as opposed to the very bottom of the cell.
Which method do I choose?

I have had great results by simply putting the queen into a queen-less or re-queening colony whilst she is still inside the travel cage she came in without removing her or any of the worker bees that were with her. Since then I have used these very same travel cages to dispatch my own queen bees and provided the same advice to my customers, all of whom have reported great results after they followed the same introduction methods.
The nucleus – I make up a nuc of bees and introduce my new queen bee into the nuc rather than introducing her to a full colony of bees. However, this is not always possible for the beekeeper to achieve as they may only have one colony meaning their only option is to introduce the new queen to a full colony.
The full colony – I have used this method of introduction as well, by simply using the same cage the new queen comes in supported by her attendants. I tend to opt for this method if I am re-queening a failing or old queen from a full colony and the bees are of a relatively good nature. If the bees are aggressive I would opt for the delayed method or using a queen introduction cage (both of these methods are covered later).
If you decide you want remove the workers from the cage, please make sure you do this near a closed window as all the bees will fly to light of the window. If you have then, in the process, accidentally let the queen go you can simply place the cage back over the queen when she hits the window and slide the cover back into place thereby trapping the queen back inside the travel cage on her own.
Standard Method of Release

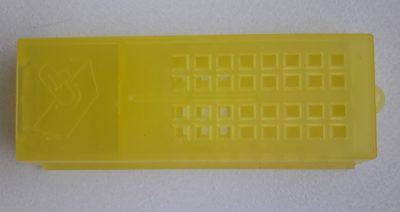
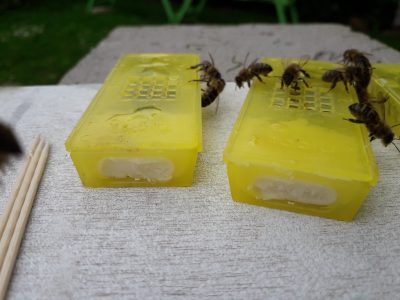
Your new queen bee will arrive in a plastic or wooden queen travel cage with a few workers, a block of candy at one end and possibly a candy or cork stop/plug at the other. As mentioned above, I leave the workers in when I re-queen my colonies or when making up my nucs and this has always worked for me.
Open the outer packing the new queen has arrived in and inspect her inside the queen travelling cage to ensure she is okay. Once satisfied she is active, check the candy block is full and remove the plastic seal in the end.

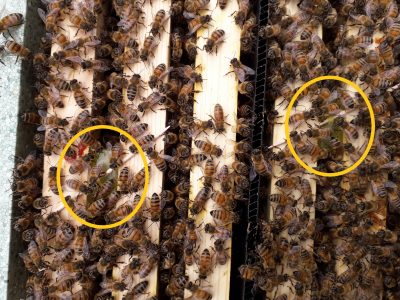
Open up the nuc or full colony using the minimum of smoke. The queen travel cage, with the candy block in place, should then be positioned between two frames of brood with the release seal (candy block) facing down or sideways ensuring the plastic seal is removed. The face, not the lid of the travel cage should be exposed between the two frames; don’t bury this in the wax comb. The bees of the nuc or colony will slowly chew through the candy block assisted by the attendants on the inside of the cage and the queen will walk out, the bees having had a chance to adapt to the queen bee’s smell (pheromones).

Depending on your frame top bar width, the queen travel cage should be placed between the frames nicely or you may need to suspend it using a map pin or cocktail stick. There is a convenient hole on the travel cage that allows this. You can enhance the acceptance of the queen by lightly spraying both queen cage and surrounding bees on the frames with water or sugar water, but this is not essential. Once this has happened close up the hive and leave it for between 6 – 8 days before inspecting. Once you have revisited the nuc or colony gently remove the travel cage and quickly inspect for eggs and the new queen. Once found, close up the hive and set your normal inspection routine in place.
If the bees start behaving aggressively and balling the cage as you initially set it between the frames in the hive, then opt for the delayed method of introduction.
Delayed Method of Release
Open the outer packing the new queen bee has arrived in and inspect her inside the queen traveling cage to ensure she is okay. Once satisfied she is active, you can opt to delay the release of the queen by leaving the plastic sealing tab in on the queen travel cage initially or the tape in place on the wooden travel cage. It is generally recognised that you get a better rate of acceptance if you delay the release of the queen by a few days, depending on how long the colony or nuc has been queen-less.
To achieve the delayed release method of release, complete the following:
Open your hive up using the absolute minimum amount of smoke. After setting the queen travel cage into your hive, as mentioned in the standard method of introduction, re-assemble the hive and leave it for between 8 -10 days before inspecting. The colony or nucs’ worker bees will get used to the smell (pheromones) of the new queen bee over time and her attendants will start to chew through the candy block. Once the candy block has been consumed the colony/nuc will tend to the needs of the queen and her attendants. If you have opted to delay the queen bee from being released you will need to return to your hive to remove the plastic sealing tab or the tape on the wooden cage. On your return to the hive use minimum smoke, and quickly but gently remove the sealing tab on the top of the queen travel cage to expose the queen and her attendants. Once removed place the cage back to the frame and observe the queen, her attendants and the surrounding bees on the frame. Be careful as the queen may come straight out once the seal or tape is removed. If this does happen, quickly and gently put the cage in the top bars so she can move straight down through the frames. In the unlikely event there is still candy in the travel cage to eat through, put the cage back where it was and close the up the hive again immediately, returning to the hive in a couple of days to release the queen and her attendants. The bees would normally eat through the candy within a couple of days so this should not occur. The bees in the colony should not show any aggression to the queen bee. Once accepted and you observe the queen moving down through the frames, remove the travelling cage, close up the hive and leave the hive for between 7 to 10 days before inspecting. On your next inspection carefully look for eggs or the new queen bee and, once found, close up the hive and set your normal inspection routine in place.
Using a Queen Introduction Cage – Delayed Release
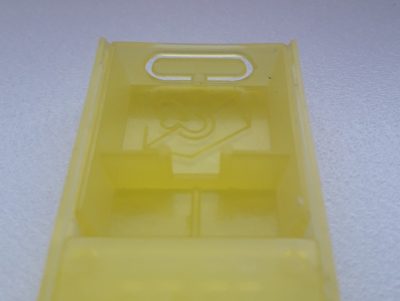
To do this, first you need to assemble the plastic Introduction cage if not already completed. These cages can also be of metal construction and are pre- made, however the metalled ones have no entrance hole or candy tray. Once assembled (plastic cage), open the outer packaging the new queen bee has arrived in and inspect her inside the queen travelling cage to ensure she is okay. Once satisfied she is active, open up the hive using the minimum of smoke. To use the queen introduction cage method you would need to fix the cage to the face of a frame of sealed or emerging brood, taking your selected frame of brood and shaking all the bees off it prior to fixing the introduction cage in place. Press the queen introduction cage onto the frame over some of the emerging brood and empty cells, if possible. Open up the queen travel cage and allow the new queen bee to enter the introduction cage through the small hole with her attendants. Once the queen bee and her attendants are inside the introduction cage, seal the cage hole with the cap. There is also a candy compartment inside the tray if required. I always fill this candy tray for the attendants!! Return the frame to the colony and close up the hive. The queen bee will start to move over the comb as the nurse bees start hatching. Normally the queen’s smell (pheromones) will reassure and settle both the nurse bees, who know no different being newly hatched, as well as the remaining bees in the colony thus starting the queens’ acceptance process. Her abdomen will have swollen back to normal size whilst under the cage and she will have started showing an interest in laying, if not already laying in those cells vacated by the hatched nurse bees. After a sufficient number of young bees have emerged, which may take several days, the cap (if used) or cage can be removed so that the queen bee can walk out in her own time along with the nurse bees. Please don’t be in a hurry to do this!! On your next inspection after approximately 8 – 10 days the cap or cage can be removed and the queen will walk away. Close up the hive and leave for 7 days. On your next inspection look for eggs and the queen bee and once found, close up the hive and set your normal inspection routine in place.
Notes
The queen introduction cage is a really good method to use if you are re-queening an aggressive colony. Another handy hint to help re-queening with aggressive bees is to spray the bees, the introduction cage and the new queen in it with sugar water. By the time the bees have cleaned themselves of the sugar water, the new queen’s pheromones have already spread through the colony and started to influence their change and her acceptance.
If you are trying to re-queen a queen-less colony that has no brood then I suggest placing the travelling cage between the two middle frames that are occupied by bees. Again, if the colony is an aggressive one I would recommend you use the delayed release method of queen bee introduction if using the travel cage or better still, opt to use the queen introduction cage.
You may also at times come across beekeepers that insist their success rate of introduction is purely down to them using an introduction cage where they have removed all the attendant bees from the travel cage. It really is your choice. I only opt to use an introduction cage if the bees have a certain disposition (aggressiveness) although I have seen the queen introduction cage employed by other beekeepers quite successfully.
Whichever method you do decide to use (and this cannot be stressed enough) avoid disturbing the bees too soon as any disturbance could possibly cause the queen bee to be rejected. The queen will normally start laying within a couple of days of being released from the cage. On your next inspection you can remove any travel or Introduction cage and look for the queen bee or eggs. If you find eggs, this will indicate to you that the new queen is laying and that she has been fully accepted within the colony.
I hope you have found this information useful. As you can see, there are a lot of methods of queen bee introduction and we all have our own way of achieving this. Over time so will you. There is no right or wrong!